 Flare iOS App
Built to spark real-world connections — not just scrolls.
Flare is a Swift-based iOS social media app designed to make it easier for friends to share and discover local events and spontaneous hangouts. Unlike traditional platforms, Flare focuses on short-term, in-person plans — helping users coordinate meetups in real time without the noise of global feeds or long-term planning. The app emphasizes lightweight interactions, intuitive UI, and privacy-conscious design to keep the experience fast, friendly, and focused.
- Backend Repository: github.com/ottles91/flare-api
- Frontend Repository: github.com/ottles91/flare-frontend
🧩 Key Features
- Secure user login and session management with persistent access
- Location-based event discovery with real-time filtering
- Clean, responsive UI optimized for modern iOS devices
- Personalized user profiles with event history
- Scalable architecture built for future platform expansion
🛠️ Technologies Used
- Swift & SwiftUI for building native iOS interfaces
- MVVM architecture for clean separation of concerns
- ASP.NET Core with C# for the backend API
- MySQL database with Entity Framework Core ORM
- JWT authentication for secure API access
- XCTest for unit testing and Postman for API validation
- Git & GitHub for source control and collaboration
🧰 Tools & Platforms
- Xcode for iOS development and debugging
- Visual Studio Code for backend API development
- iOS Simulator for testing on various device configurations
- XCTest for unit testing Swift code
- Postman for API testing and documentation
- Docker for containerized development environments
- GitHub for source control
- Jira for project management
- Figma for UI prototyping
📱 Frontend
- Built with Swift and SwiftUI, using a modular MVVM architecture
- ViewModels manage state and decouple business logic from views
- Asynchronous data loading via
async/awaitwith Combine or Task API - Integrated search functionality with live filtering of friend data
- Reusable custom components for user cards and empty states
- Unit-tested with XCTest to verify state changes and data bindings
- Theming-ready layout with support for dark mode and dynamic system fonts
💻 Backend API
- RESTful API built with ASP.NET Core and structured around controller-based routing
- JWT-based authentication with role-based authorization for protected endpoints
- MySQL database integration using Entity Framework Core for schema mapping
- DTOs used to decouple domain models from API surface
- Logging and error handling middleware for centralized exception tracking
- Unit and integration tests for key endpoints using xUnit
- Organized into layered architecture (Controllers, Services, Repositories)
Feature Overview
Account Creation
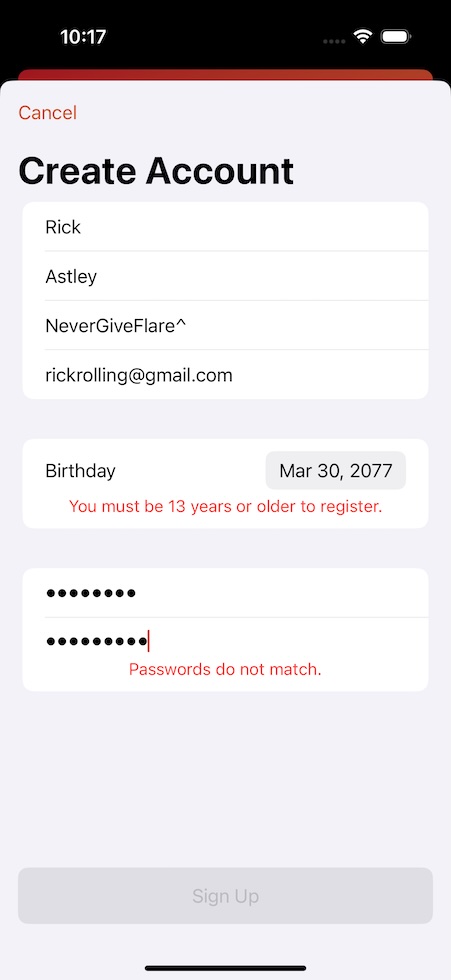
To get started with Flare, you'll need to create an account. On the sign-up screen, you'll need tp provide the following details in order to create your account:
- First Name
- Last Name
- Username - Must be unique
- Email Address - A valid email is required, as it may be used for password recovery or account-related notifications
- Date of Birth - Users must be at least 13 years old to register for account
- Password - All passwords must meet the following security requirements
- At least 8 characters long
- At least one uppercase letter
- At least one lowercase letter
- At least one number
- At least one special character (e.g., !@#$%^&*)
Once you've entered your details, tap “Sign Up” to create your account. You'll then be redirected to the login screen to sign in and start using Flare
The Map
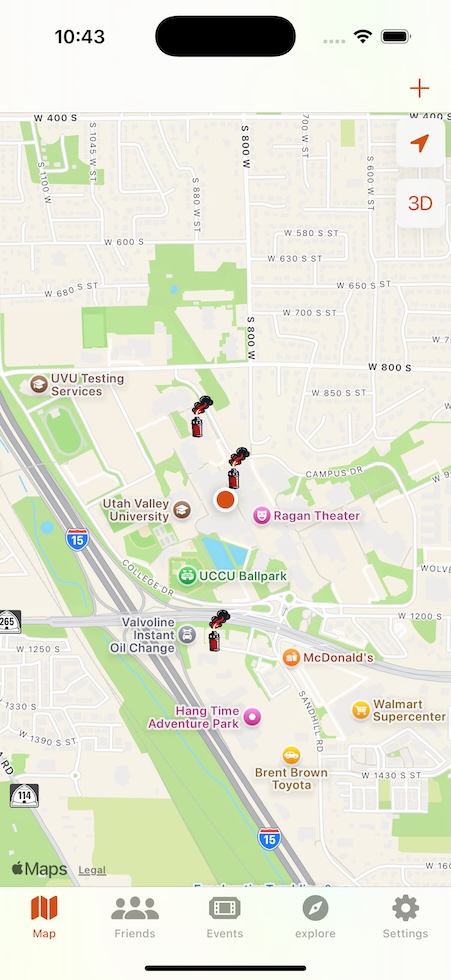
After logging in, you'll be taken to the main screen, which features a large interactive map and a tab bar at the bottom for easy navigation between different sections of the app.
- Map - The primary view of Flare...
- Friends - View your current friends and search for new connections
- Events - Browse events hosted by businesses...
- Explore - Get personalized recommendations...
- Settings - Manage your account preferences...
Using the Map
The map is the heart of Flare...
- Compass - Centers the map to your current location
- 3D Button - Switches to a more realistic perspective...
Viewing a Flare
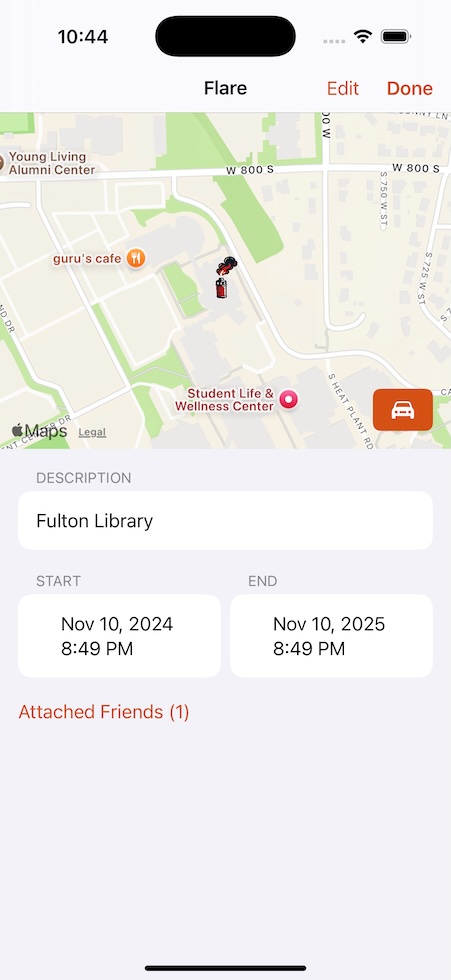
Tapping on a Flare pin on the map opens its details screen, which provides information about that Flare. The details screen includes:
- Location
- Start Time
- End Time
- Location
- List of attendes
You can also get driving directions to the Flare location via Apple Maps. If you created the Flare, you'll have the option to edit its details using the “Edit” button. When you're done, tap “Done” to return to the map view.
Creating a Flare
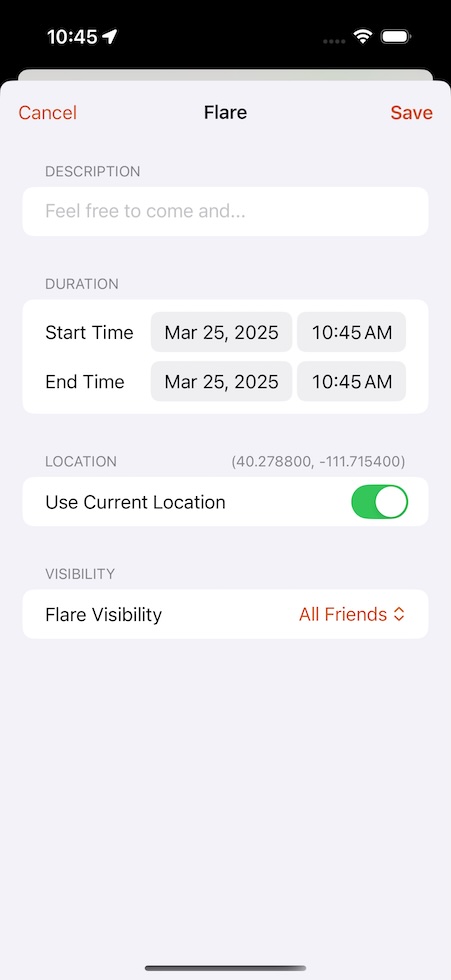
You can create a Flare in one of two ways:
- Long-Press on the Map - This opens a new Flare creation screen with the location pre-filled
- Tap the “+” button at the top bar of the main map view pre-filled
Required Flare Details
To create a Flare, you'll need to provide the following information:
- Title - A short, descriptive title for the Flare
- Start Time - The date and time when the Flare begins
- End Time - The date and time when the Flare ends
- Location - The physical location of the Flare, which can be set by long-pressing on the map or entering an address
- Flare Visibility - Choose who can see your Flare
- All Friends - Only visible to your friends
- Public - Visible to all users on Flare
- Custom - Allows you to select specific friends who can view the Flare
Editing a Flare
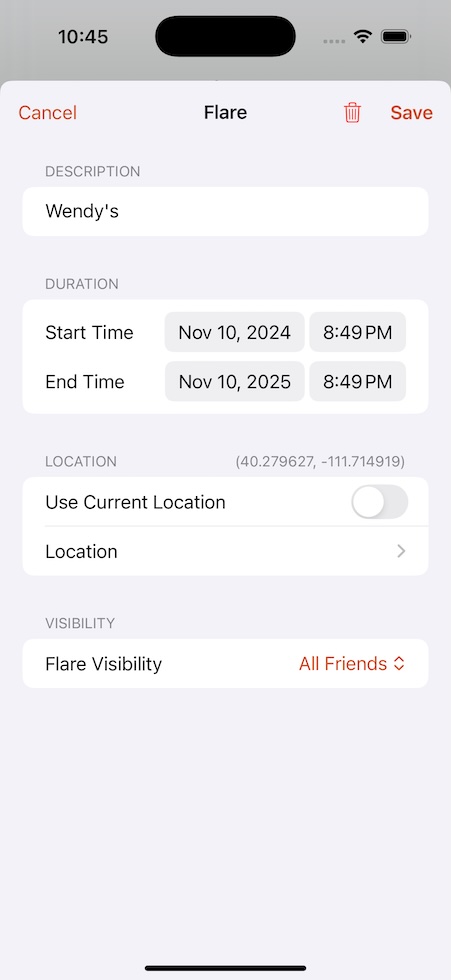
If you created a Flare, you can edit its details at any time by tapping the “Edit” button on the Flare details screen. The following details can be modified:
- Title
- Start Time
- End Time
- Location
- Flare Visibility - Visibility can be toggled between the three options
- All Friends
- Public
- Custom
You can also delete the Flare by tapping the trashcan icon.
Once you've made your changes, tap “Save” to apply them and return to the map screen.
Friends List
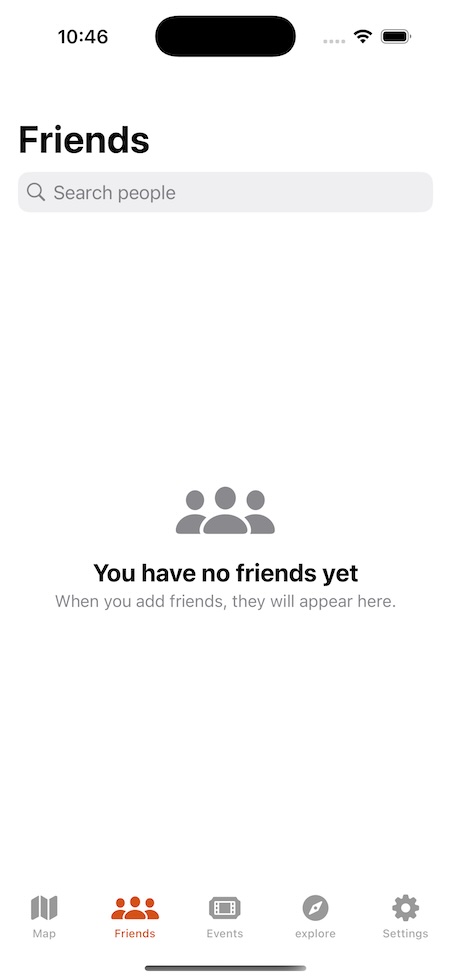
The Friends tab displays all of your current friends. When you first create a Flare account, your list will be empty—but don't worry! You can use the Search bar to explore all Flare users and send friend requests to start building your network!
Searching Users & Adding Friends
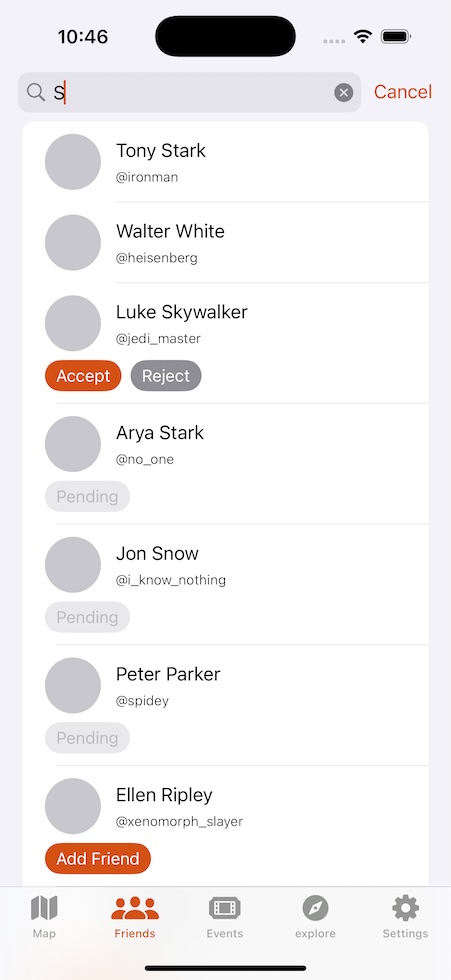
When you search in the Friends tab, users will appear in the following order:
- Current friends
- Incoming Friend Requests - Users who have sent you a request, with “Accept” and “Reject” options available
- Pending Requests - Users you've sent a friend request to who haven't responded yet
- All Other Users - Users who are not currently your friends. You can send a friend request by tapping the "Add Friend" button